3D Printing the Farnsworth House - Part 1
by FormIt team, 12 August 2016
In this two part post, I will show how I prepped and 3D printed the Farnsworth House model that I highlighted last month as part of the FormIt Primer. Part 1 will focus on using FormIt's tools to set you up for success and in Part 2 we will reveal the final 3D printed result. Since this is my first time attempting to 3D print architectural details - I predict there may be some failed prints along the way. I will be attempting to print these using the MakerBot Replicator 2X.
Step 1: Scale and Detail
I want this model to print at a proper architectural scale. Instead of fooling around with Imperial, I switched to Metric (yay!) This made things much easier as you will see later when I bring the models into MakerWare. This model will be printed at 1:100 scale. It turns out the main floor fits perfectly on the MakerBot print bed at this scale!
3D printing architectural details can be challenging. One of the things I learned immediately is that details such as the columns just will not print well at this scale. So, we can use some of FormIt's 3D editing tools to fake it. First, we will "thicken" the columns. A handy trick here is to hover over a face and then press the Tab key to select all simliar and attached faces. Then, when you pull one out, all of the faces come up. See the video for an example:
Step 2: Groups and Layers
Groups and Layers are your friends for 3D printing! I assume you already have your model well organized into groups - There is no other way to work well in FormIt. Layers are helpful for managing which objects are visible. For this project, I set up a Layer for each set of objects that I expect to print in a single run.

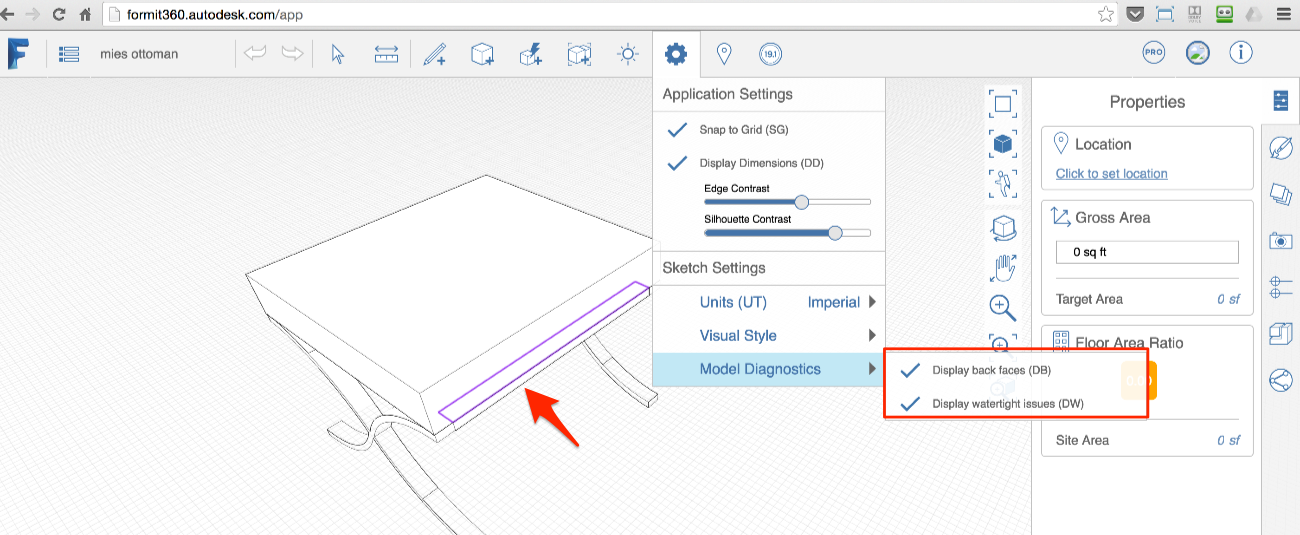
Step 3: Check for water tight issues
Two handy tools in FormIt are visibility settings that show any rotated backfaces and/or watertight issues. This last one is critical since a non-watertight model will create no end of headaches when attempting to 3D print. This is particularly useful when importing a SketchUp file from the Warehouse. SketchUp models tend to have many watertight issues. Here is an example: I downloaded this ottoman and imported into FormIt using the Windows app. The Watertight Issues pointed out a missing face in the model.
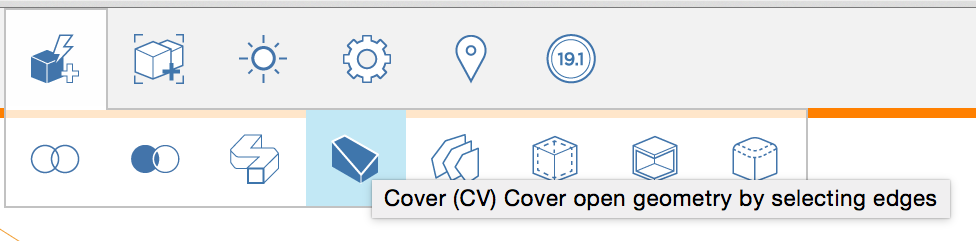
I was able to quickly fix this using the Cover tool. All ready to export!
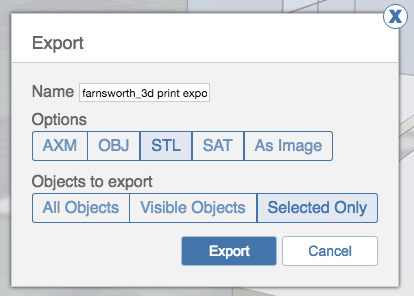
Step 4: Export Visible or Selected
Once you have the Layers set up the way you like, you are ready to start exporting. For repeatable items like the columns, remember you only need to export ONE since you will want to duplicate and arrange them in the 3D printing pre-flight software. With everything else hidden, you can use Export > Visible Objects or Selected Only to export either the scene or individual objects to the STL format. Now we are ready to get Printing! Stay tuned next week when we start to get all of this 3D printed.